 how-to
5 Steps in the Roof Tear-Off Cleanup Process Explained
Last Updated: October 25, 2026
Quick Summary
Roof tear-off cleanup is the process of removing debris, protecting your property, and preparing the site after old roofing materials have been removed during a roof replacement. This cleanup involves several critical steps including debris containment, nail removal, landscaping protection, and final inspection to ensure no nails, shingles, or debris remain on your property.
- Nail cleanup requires at least two mechanical sweeps plus hand-picking detail and a final verification pass for thorough removal.
- Ground tarps, catch systems, dumpsters, and direct-to-truck hauling are four containment options matched to property layout.
- Landscaping protection starts with a crew walkthrough to identify plants needing tarps, plywood, or temporary fencing before work begins.
- Cleanup typically takes one to two additional days beyond the roof removal timeline for most residential properties.
- A final walkthrough checklist verifies all debris removal, nail cleanup, gutter clearing, and landscaping restoration before crew departure.
Table of Contents
- What Happens During a Roof Tear-Off Cleanup
- Step 1: Remove Roofing Debris and Cart Away Materials
- Step 2: Conduct Roofing Nail Cleanup After Roof Replacement
- Step 3: How Roofers Protect Landscaping During Roof Replacement
- Step 4: Inspect and Clean Your Driveway and Walkways
- How Long Does Roof Tear-Off Cleanup Take
- Your Roof Replacement Cleanup Checklist Before Final Walkthrough
- Schedule Your Free Roof Evaluation Today
- Frequently Asked Questions
What Happens During a Roof Tear-Off Cleanup
A roof tear-off cleanup is the process of removing debris, protecting your property, and preparing the site after old roofing materials have been removed during a roof replacement. This cleanup involves several critical steps to ensure no nails, shingles, or debris remain on your property.
The roof tear-off cleanup process isn't just about sweeping up. It requires careful planning, proper equipment, and attention to detail. At Roofing Done Right, we've learned that most homeowners underestimate how thorough this work needs to be.
This guide walks you through each phase of the cleanup process. For a complementary perspective, explore a step-by-step guide covering similar roof cleanup topics in different detail.
Step 1: Remove Roofing Debris and Cart Away Materials
The first cleanup decision is made before the first shingle is pried up: how will debris be contained, and where will it go? The answer depends on site layout, roofing material, and local disposal options, and it drives the rest of the cleanup workflow.
Containment options. Crews generally choose among four approaches, often combining them:
- Ground tarps. Heavy-duty tarps laid along the drip line catch shingles and nails as they fall. Best for simple roofs with accessible yards. Tarps must be weighted or staked so wind does not lift them.
- Catch systems. Some crews rig a tarp chute or debris slide from the roof edge to a central drop zone, keeping debris off landscaping and walkways. Useful on steep roofs or tight lots.
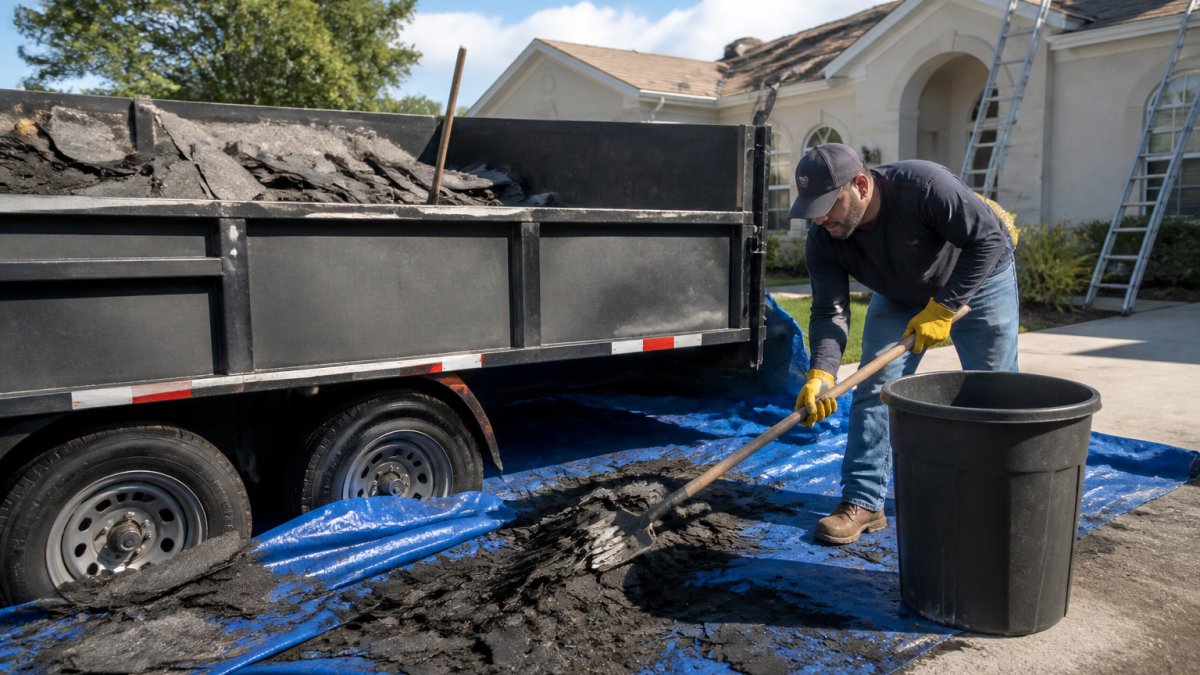
- Dumpster placement. A roll-off dumpster is typically set on the driveway, as close to the work area as possible without blocking access. Crews often lay plywood under the dumpster to protect the driveway surface.
- Direct-to-truck hauling. On smaller jobs or where a dumpster is not practical, crews bag or bundle debris and load it directly into a truck or trailer.
Disposal and recycling. Shingle debris is heavy, a typical tear-off produces several tons of material, so disposal logistics matter. Options include:
- Landfill disposal. The most common route. Crews separate metal flashing, nails, and other recyclable metals before hauling.
- Shingle recycling. Some areas have facilities that accept asphalt shingles for road base or new asphalt. Availability varies by region, so ask your contractor whether recycling is an option.
- Metal recovery. Flashing, drip edge, and fasteners are typically separated and recycled.
- Wood decking. Damaged decking is usually stacked separately for disposal or, where accepted, chipped or recycled.
How site layout changes the plan. A property with a narrow driveway and mature landscaping may require a catch system and hand-carrying debris to a street-side dumpster. A property with a wide, clear driveway can use a dumpster placed close to the house and ground tarps along the drip line.
A clean tear-off starts with a containment and disposal plan matched to the property, not a one-size-fits-all dumpster drop.
Step 2: Conduct Roofing Nail Cleanup After Roof Replacement
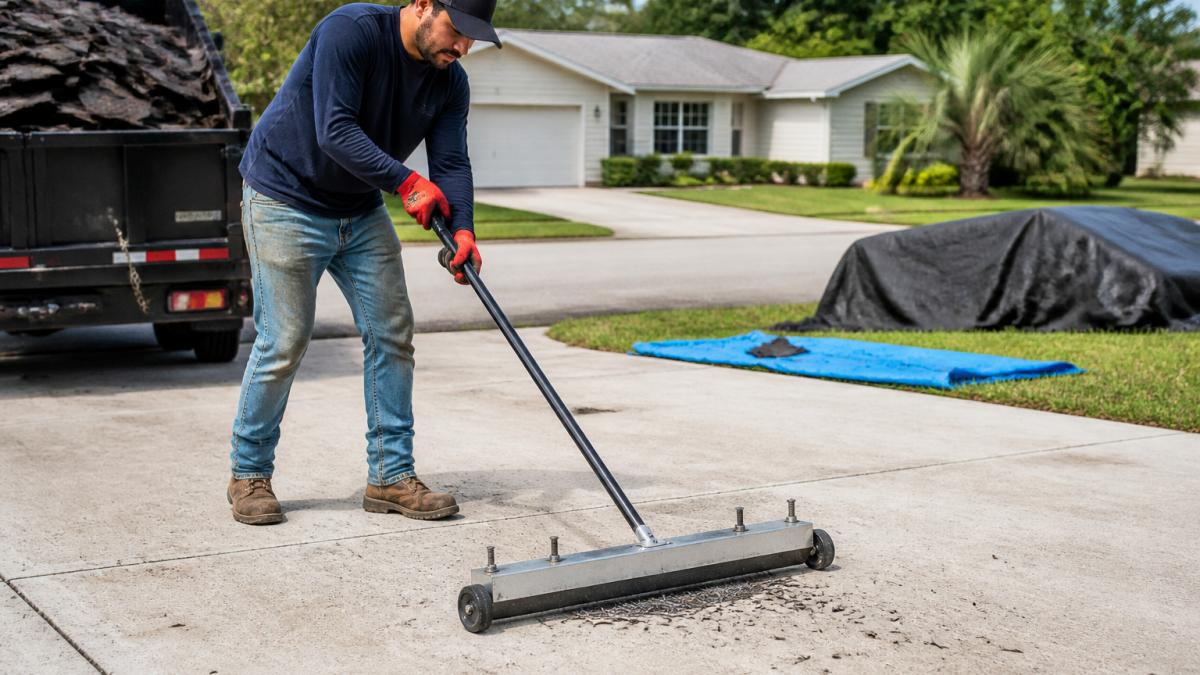
Nail cleanup is the single most scrutinized part of a tear-off, and it is where rushed crews get exposed.
A thorough nail-removal workflow typically runs in this order:
- Containment first. Before debris falls, crews lay tarps along the drip line and place plywood or tarp runners over walkways and driveways. Nails that land on a tarp are recovered in minutes; nails that land in mulch can take days to find.
- Gross removal. Shingles, underlayment, and cap nails are loaded out. A wheeled magnetic sweeper follows the debris path immediately, not at the end of the day, so nails do not get driven over or embedded.
- Perimeter sweep. The crew sweeps the lawn, driveway, sidewalk, and gutter line in overlapping lanes. Most practitioners run at least two passes in opposite directions, then a third pass after the dumpster is pulled.
- Hand-pick detail. Garden beds, mulch, rock landscaping, and the seams between driveway slabs get hand-picked with a rolling magnet and a nail claw. These are the spots a wide sweeper cannot reach.
- Gutter and downspout check. Nails and shingle fragments collect in gutter troughs and downspout elbows. A crew should flush or hand-clear these before calling the job clean.
- Verification pass. A final walk with a magnetic sweeper and a visual scan of the entire ground perimeter, including under vehicles and along the foundation line.
How many passes is enough? There is no universal number, but a common pattern is two mechanical sweeps plus a hand-pick detail plus a final verification sweep, four touches total. On large lots or properties with heavy landscaping, crews may add a fifth pass the morning after tear-off, when rain or dew has settled debris and made nails easier to spot.
Watch out for crews that sweep only the driveway and skip the lawn edge, mulch beds, and gutter line. Those are the areas most likely to produce a flat tire or a barefoot injury weeks after the job is done.
A thorough nail-removal workflow follows a chronological sequence to ensure complete cleanup.
| Cleanup Phase | What Happens | Key Detail |
|---|---|---|
| Containment first | Tarps laid along drip line, plywood over walkways | Nails recovered in minutes if on tarp |
| Gross removal | Shingles and debris loaded, magnetic sweeper follows | Done immediately, not at end of day |
| Perimeter sweep | Lawn, driveway, sidewalk, gutter line swept | At least two passes in opposite directions |
| Hand-pick detail | Garden beds, mulch, rock landscaping cleared | Magnet and nail claw for unreachable spots |
| Gutter check | Gutters and downspouts flushed or hand-cleared | Catches nails and shingle fragments |
| Verification pass | Final walk with magnetic sweeper and visual scan | Includes under vehicles and foundation line |
Step 3: How Roofers Protect Landscaping During Roof Replacement
Before work even begins, a good crew protects your landscaping. This means covering shrubs, flower beds, and plants near the house with tarps or plywood. Falling debris can crush plants and damage gardens.
How roofers protect landscaping during roof replacement starts with a walkthrough. The crew identifies which plants and landscape features need protection. They place barriers and tarps strategically to catch debris while allowing water drainage.
Protection methods include:
Request a Free Roofing Estimate →
- Tarps over shrubs and flower beds
- Plywood sheets protecting delicate plants
- Temporary fencing around high-value landscaping
- Gutter guards to catch debris
- Careful placement of dumpsters away from gardens
The crew removes these protections only after cleanup is complete. This keeps your landscape intact and saves you from replanting costs.
Step 4: Inspect and Clean Your Driveway and Walkways
Once debris removal and nail cleanup are done, your driveway and walkways need a final inspection. Even after magnetic sweeping, small pieces can remain. A thorough final walkthrough catches anything the sweepers missed.
This inspection includes:
- Visual scan of all hard surfaces
- Checking under cars and along edges
- Inspecting gutters for debris accumulation
- Looking for any shingle fragments or metal pieces
- Documenting the condition before the crew leaves
A professional crew takes photos or video showing the property is clean. This protects both you and the contractor. If debris appears later, you have documentation of what was completed.
How Long Does Roof Tear-Off Cleanup Take
The timeline for roof tear-off cleanup depends on several factors. A small residential roof might need one to two days of cleanup work. A larger commercial building or complex residential structure could take three to five days.
Factors that affect cleanup duration:
- Roof size and complexity
- Weather conditions (rain slows work)
- Debris disposal options available
- Landscape density and protection needs
- Number of crew members assigned
Most homeowners see cleanup completed within the same timeframe as the actual roof removal. If your roof replacement takes three days, expect cleanup to take one to two additional days.
Your Roof Replacement Cleanup Checklist Before Final Walkthrough
Before your roofer leaves the job, use this checklist to verify cleanup is complete:
- All old roofing materials removed and disposed of
- Driveway swept with magnetic sweeper multiple times
- Walkways cleared of debris and nails
- Gutters and downspouts cleaned
- Landscaping protections removed and plants checked
- Roof deck inspected and documented
- No visible debris on property
- Nails cannot be found by foot or hand
- Photos or video showing completed cleanup
- Final invoice matches agreed-upon scope
This checklist protects you by ensuring nothing was missed. A thorough final walkthrough is your chance to catch any issues before the crew leaves.
Schedule Your Free Roof Evaluation Today
A roof replacement is a major project, and cleanup is just as important as the installation itself. Before you commit to any roofing work, understanding the full scope of the job, including cleanup, helps you make an informed decision.
Roofing Done Right handles every phase of roof replacement with the same care we bring to cleanup. When you're ready to discuss your roof replacement needs, get your free roof inspection to assess your specific situation. You can also learn how to hire an honest roofer to ensure you're working with a contractor who treats cleanup as seriously as we do.
Our team is ready to answer your questions and provide a detailed estimate with no obligation.
Frequently Asked Questions
What is included in the roof tear-off cleanup process?
The roof tear-off cleanup process includes removal and disposal of all roofing debris, magnetic sweeping for nails, inspection of landscaping and property surfaces, driveway and walkway cleaning, and a final walkthrough to verify no materials remain. A professional crew will protect your property throughout, using tarps and containment methods to minimize scattered debris and ensure your yard and home are treated with care.
How do I check my yard for roofing nails after a replacement?
After the roofing crew completes the roofing nail cleanup, walk your yard, driveway, and walkways carefully. Look for any glint of metal or small debris in grass, landscaping beds, and along edges. A magnetic sweeper can help catch any nails missed during the professional cleanup. If you find nails or debris, contact your roofer immediately to document and address it, reputable contractors stand behind their work.
How long does roof tear-off cleanup take?
Cleanup timing depends on the roof size, debris volume, and property layout. Most residential tear-offs require 1-3 additional days for thorough cleanup, including debris removal, nail sweeping, and final inspection. Weather conditions and the complexity of protecting landscaping may extend this timeframe. Your contractor should communicate the expected cleanup schedule upfront so you know when your property will be fully restored.
What should I do if I find debris after the roofing crew leaves?
Document any remaining debris with photos and contact your contractor immediately. Professional roofers stand behind their cleanup work and will return to address missed materials at no additional cost. This is a key part of treating customers like family, your contractor should ensure your property is completely clean before the job is considered finished.
Getting nails out of your driveway and protecting your landscaping during a roof tear-off requires expertise and attention. Roofing Done Right manages the complete roof tear-off cleanup process with magnetic sweeping, debris removal, and property protection that keeps your home safe and your yard intact. Let us handle your next roof replacement with the thoroughness your property deserves.